
- Super Glue vs Epoxy - February 10, 2022
- How to Get Started with Stippling Art - January 18, 2022
- Brother PE770 Review and Guide - January 14, 2022
Stippling is the art of creating patterns using small dots. While a seemingly simple practice, you can create extraordinarily gorgeous and complex works of art that capture light and give the impression of subtle movement.
Stippling patterns boast varying degrees of complexity through shading and solidity. In drawings and paintings, the dots tend to be monochromatic (usually black and white) colors. Then, denser shades (more dots) of one color can be used to create darker or lighter parts of the image.
Stippling is similar to pointillism, which branched from impressionist art. Pointillism emulates patterns in nature and can convey a sense of rhythm and movement and capture a light’s flow. However, stippling is different from pointillism in both technique and history.
Stippling art as we know it today originally emerged from stippling engravings in the 14th and 15th centuries. The tone was applied to intaglio (a type of printmaking) by gouging out dots or etching.
Although initially it was created in conjunction with traditional line engraving, it reemerged as a distinct technique used to produce chalk drawings imitations.
Nowadays, stippling is synonymous with black and white dot art, which you can achieve using various mediums and techniques. That said, in this article, we’re taking an in-depth look at how to get started with stippling art. Let’s dive in!
What Do You Want to Create?

First things first, you need to decide on the image you want to recreate. Although we’ll discuss this below in greater detail, for the time being, here are some basic considerations to bear in mind:
- Look carefully at the shapes used in your image, and note their key characteristics and placements.
- Determine the light source. Where’s the light hitting the different elements of your image? Knowing this will affect where you need to add more or less stippling.
- Lastly, look at the shading. Stippling isn’t just contained to the density of the dots. It also accounts for the light value of the color you choose. Get a rough gauge of the darkest and lightest values of your images and try to practice them before you start.
Mediums You Can Use to Create Stippling Art
Once you have an idea of the masterpiece you want to create, you’re better positioned to pick a medium to bring your work to life. Below are the three most commonly used mediums for stippling art:
Fine Point Pen

Most artists choose a .03 or .005 inch (0.0 cm) nib that allows them to form smaller dots and more sophisticated shading.
We recommend STAEDTLER’s 0.05 PIGMENT LINER FINELINER 0.05. It’s a fine tip waterproof ink pen, with a 4.7 out of 5-star rating on Amazon.
Pencil
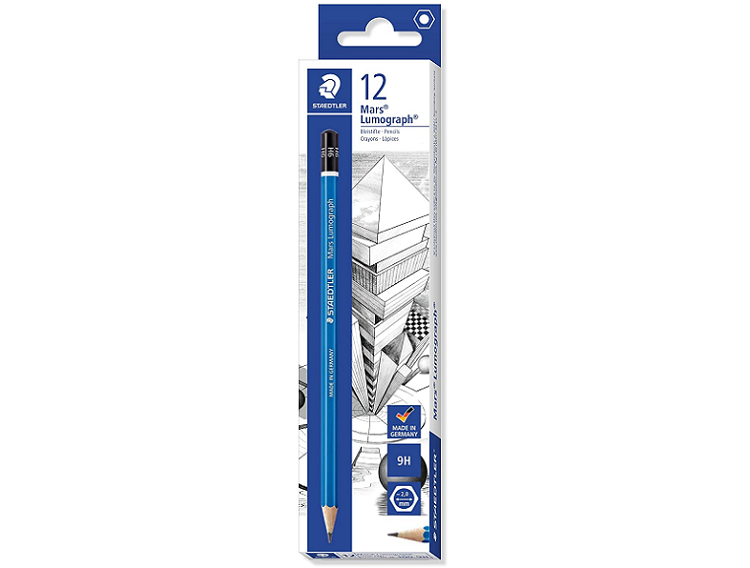
You just have to be careful of accidentally smearing or blending your work, which can ruin the effect. Colored pencils are less likely to smudge, but keeping the tip sharp is also more difficult compared to a fine point pen. We suggest the Staedtler Mars Lumograph 9H Premium Quality Pencil.
9h is the hardest lead you can get, so it’s less likely to smudge. Here, you’re looking to spend $16.28 for a set of 12 pencils. This particular product boasts a 4.2 out of 5-star Amazon rating.
Paintbrushes
This is another option you can try. You can choose from watercolors, oil, or acrylic paint. It’s considered the most difficult of the three mediums because of the liquidity. It’s also much harder to create dots that consistently look the same.
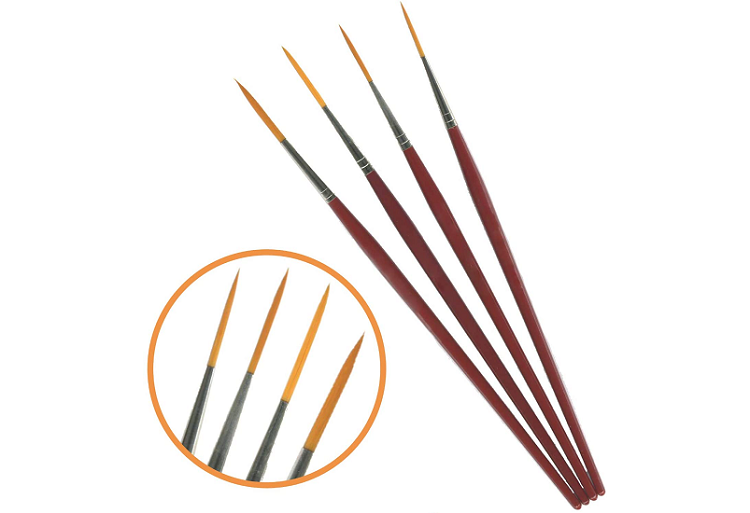
The right brush for your project is dependent on the size of the stipples you’re looking to create. For smaller, more detailed pieces you can try the Rigger Brush Set. This will set you back $7.30 for four brushes. Sizes include 0, 1, 2, 3. This product has been awarded an impressive 4.6 out of 5-star Amazon rating.
However, for larger stippling designs, stencil brushes work quite well. You could try the Patelai Wooden Stencil Brushes, which will cost you $7.96 for a set of six brushes of variable sizes. This product has a respectable 4.3 out of 5-star Amazon rating.
The Technique
Generally speaking, there are four stippling techniques: Dotting, dashing, tracing, and hatching.
Dotting
As the name implies, here you create circular patterns.
Dashing
Dashing is a modification of the dotting technique. By quickly flicking the wrist, you can create small dashes. It’s a good technique for paintings that use heavier and more textured lines.
Tracing
This is another more advanced technique used to create texture on paper. Here, you place a textured surface under the paper, such as tinsel, then lightly brush the paper’s surface with your chosen medium.
You can change the paper’s position during the process to add more variety. The lighter the pressure, the more subtle the effect.
Hatching
Hatching lines are drawn in a specific direction to create a shading effect. Cross-hatching uses two different line directions interposed over each other. Hatching is generally used to achieve a sense of depth and shadow.
All these techniques can be used individually or separately, depending on the end result you’re trying to achieve. For instance, you might introduce one technique to draw attention to a specific area or feature. The basic idea is that for darker areas, you apply more stippling.
Then for lighter areas, you reduce the amount to create a sense of gradation. While this is the basic principle, the complexity of your work may increase as you factor in different elements. You’ll also need to consider the following:
- Density
- Color
Density
Density refers to how many dots you use in a given area. The more detailed an image, the higher the density of dots. Before you begin to stipple, consider the level of detail you’re trying to achieve.
Remember that images with many shadows or darker areas will require a higher density of dots (or your stipple technique of choice). Keep this in mind as you try to balance those dots with the rest of your image.
It might be worth taking time to practice on a piece of scrap paper to get an idea of what different shading might look like. Look at how different spacing creates varying perceptions of darker and lighter areas. Use this test as a reference for your main work to ensure your spacing is even.
It’s also worth noting that the more detailed an image, the longer it will take to stipple. If you want to cut down on the time your project will take, consider using larger dots or a greater variety of color values to achieve darker elements.
Color
As mentioned before, stippling is traditionally monochromatic. Therefore, darker tone values are greeted with more stipples and vice versa.
However, there’s no hard and fast rule that says you have to use black and white. You could decide to use another color or play with varieties of the same shade. Or, you could throw caution to the wind and utilize several colors.
To give the illusion of blended colors on a stippled art piece, you can use complementary colors to achieve different tones. For the uninitiated, complementary colors are color pairs that create the greatest contrast when placed next to each other.
A few examples of complementary colors include:
- Yellow and purple
- Blue and orange
- Red and green
Stippling Art: A Step-by-step Guide

Now that we’ve covered the basics let’s go through how to create a piece of stippling art, step by step:
1. Start With the Darkest Point
Take a look at the image you want to recreate and locate the darkest area. It’s best to start here because it’s less noticeable if you make mistakes than in the lighter areas of your work because you can easily add more dots to cover up any errors.
Also, in terms of density, it will also give you an idea of how to balance the lighter areas of your image.
2. Develop the Basic Shapes
Fill in the dark areas first and use this to build up the basic shapes of your image. These dots will begin to form patterns and shapes from a distance.
3. Add Details and Lighter Values
Now that you have the picture’s outline, you can work on the lighter areas. To build lighter value areas, add dots further apart from each other. At this point, you can decide how your image flows. You can make it more dramatic by layering up tone values or adding patterns.
Suppose you’re using a fluid medium like paint. In that case, the motion may also factor into the overall effect of the image. The way an artist creates impressions (through pressure and speed) on a page will be unique to them.
But, for instance, you might use faster motions to bring a moving image to life or more calculated and precise motions to envision stillness.
You can decide to stipple at a particular angle or through set rows and columns. An orderly pattern may invoke a greater sense of stillness. In contrast, a more random array of dots is more likely to convey chaos and explosive movement across the page.
4. Fill In the Dark Areas Completely
Now that you know the artistic direction of your piece, you’ll need to decide when to stop. Needless to say, this will impact the effect you achieve. For example, a lighter or more mellow piece might not need as many dots as a heavily contrasting piece (don’t worry if you’re not sure about this, we’ll cover some tips below).
5. Take a Step Back and Review
Have you achieved what you set out to do? Don’t worry if you haven’t, artwork isn’t always about the most accurate representation of reality. Instead, it’s about capturing the subtle nuances of life that aren’t always visual, such as the emotion of a place or feelings about a person.
This is why different techniques can be used (as mentioned above) to reach your ideal outcome. With stippling, it’s good practice to take a step back from a distance and look at the piece critically. When you work too closely, you sometimes lose sight of the overall image.
Top Tips for Creating Stippling Art
Before diving into your first masterpiece, be sure to keep these top tips in mind:
Speed
With stippling art, it’s very easy to spot a mistake from the get-go. One dot out of place will be quite obvious when you step back and review. Generally, you can make these corrections as they appear. However, this will only work if you take your time to work through the piece.
As such, anticipate that your stippling art projects will take a long time, perhaps hours or days. But the result will be far better if you take your time than if you rush.
Practice
Stippling allows you to capture anything from subtle landscapes to dynamic portraits. For this reason, it’s a good idea to practice before you start on your main image or a complex project. Take time to work on getting your values right.
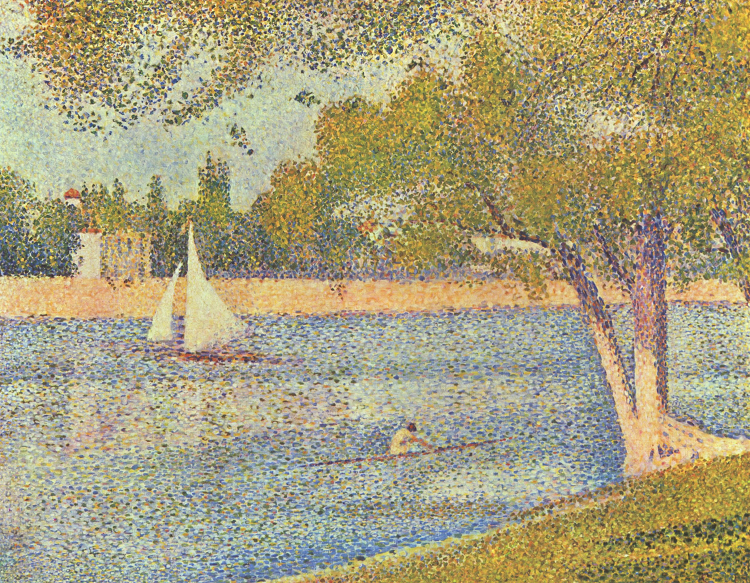
Look at examples of how the pros achieve shadows and light – for instance, impressionists like Monet or pointillists like George Seurat. Use these artworks to inspire you to capture different value scales (i.e., from dark to light) and utilize these as a point of reference as you refine your process.
The best outcome is that dark and light tones flow into each other without obvious separation. It might be a good idea to create a value scale – a strip of paper that goes from dark condensed dots, to lighter more spacious dot placement.
This will serve as a good reference if you have this beforehand to compare against as you go about creating your main piece.
Precision
As mentioned, a big part of the success or failure of stippling art is creating smooth transitions between dark and light. This means having good control over your chosen medium.
For instance, it’s recommended that you keep your utensil at a vertical angle from the paper to prevent any dashes or unwanted trails as you make your dots. This will also help to create a degree of uniformity if you want to produce an even and well-rounded effect.
Finally, ensure you know roughly:
- How big you’ll need your stipples to be before you start
- You have a good idea of placement (i.e., spacing, main features, etc.)
- Your artistic approach (motion, feeling)
In short, better planning will make it easier to create more precise works.
Spacing
As we’ve already hinted at, spacing is very important in stippling because you’re essentially relying on one color to portray different values and characteristics.
As such, it’s important to look at how you address negative space in your image. For instance, if you’re drawing an image of a dog. The dog would be your main subject, and the space behind it and around it would be your negative space.
Negative space can work in two ways. When used effectively, it can draw attention to your subject and tell your viewer what to focus on. It can also be used more unconventionally to create interesting shapes.
An artist can also suggest that the negative space is the real subject of the image, such as a small person in a desert, where negative space in such an image might express loneliness or despair.
To convey negative space, it’s important to space dots evenly. Though this isn’t a strict rule, it usually creates a more powerful outcome.
Equally as important is the absence of dots. The space between your dots can also form some negative space in your image. The relationship between dots and the absence of dots is highlighted in the density, shading, and tones of your work.
Knowing When to Stop
As we’ve already alluded to, an artist needs to know when a piece is finished. With stippling, it may feel like there’s always room to add something else because you build the work so slowly and intensely. However, overworking your masterpiece is the worst thing you can do for a stippled image.
If you’re not sure whether to continue or not, consider doing the following:
- Take a break and come back for a fresh perspective
- Compare your work to your original inspiration
- Have someone else look at the piece and give feedback
Product Recommendations To Get You Started
We’ve already discussed a few mediums that play into stippling art. In light of that, you may want to purchase the right products to get you started. That said, here are a few product recommendations:
The Staedtler 0.05 Pigment Liner Fineliner

Fineliners are great for getting started with stippling art, and we recommend the Staedtler 0.05 pigment fine liner. It’s a fine tip waterproof ink pen with a 4.7 out of 5-star rating on Amazon.
Pros
- Staedtler pigment liners are available in bundles for better value
- Waterproof ink
- No smudging
Cons
- The pigment liner can’t be refilled, and the costs of replacing these pens can add up
- Some customers note that their pens dried out in a short amount of time
Copic Multiliner SP
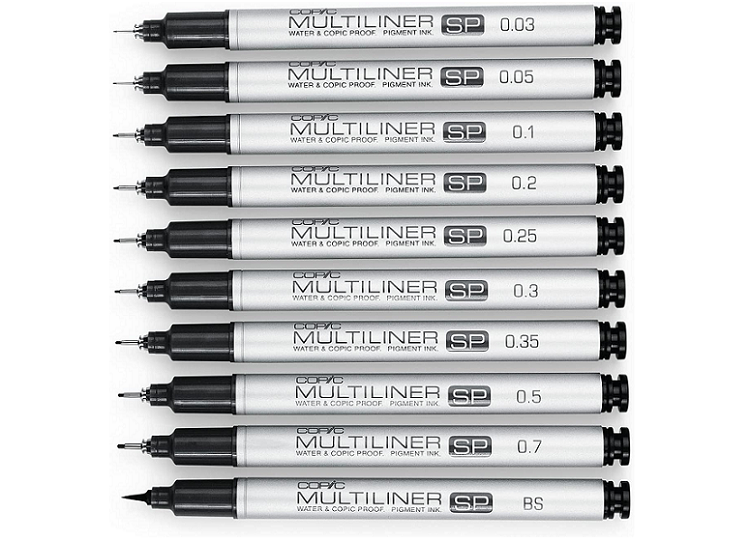
Copic multi-liners come in at a higher price range. However, artists often favor these super-fine multi-liners, especially for very precise stippling. In addition, the Copic liners can go down to as little as 0.03mm and produce a robust and waterproof color.
Pros
- Great quality ink
- The ink flows very well
- The multi-liner works well in conjunction with other Copic markers
- You can purchase cartridges and nip removers to refill these pens
Cons
- This model is more expensive than many other fine liners
- Some users didn’t find this pen ergonomic to grip
- The pen can dry quickly, so it can’t be left open for long.
Staedtler’s Mars Lumograph
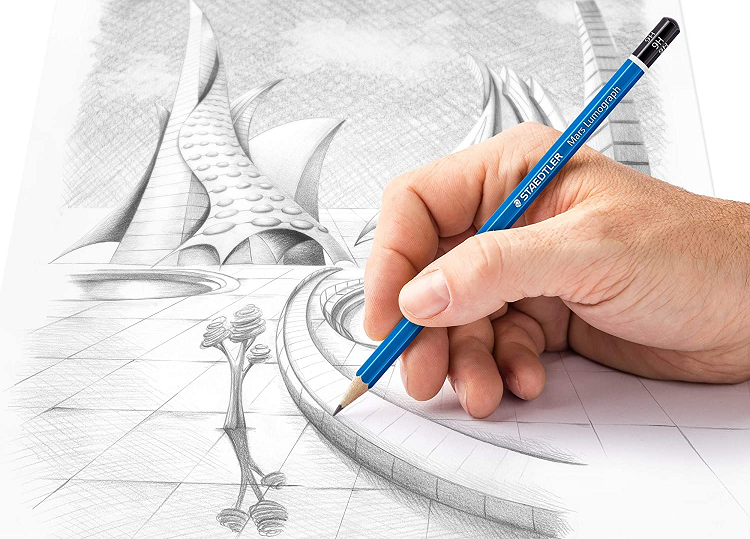
We suggest the Staedtler Mars Lumograph 9H Premium Quality Pencil if you’re opting for pencils instead. 9H is the hardest lead you can get, so it’s less likely to smudge.
Here, you’re looking to spend $16.28 for a set of 12 pencils. This particular product boasts a 4.2 out of 5-star Amazon rating.
Pros
- These pencils are easy to erase and sharpen
- These pencils are praised by artists all over
Cons
- Some find pencils too faint. Finding the right pencil for your style might take some experimenting!
- Pencils can smudge under your fingers.
Rigger Brush Set
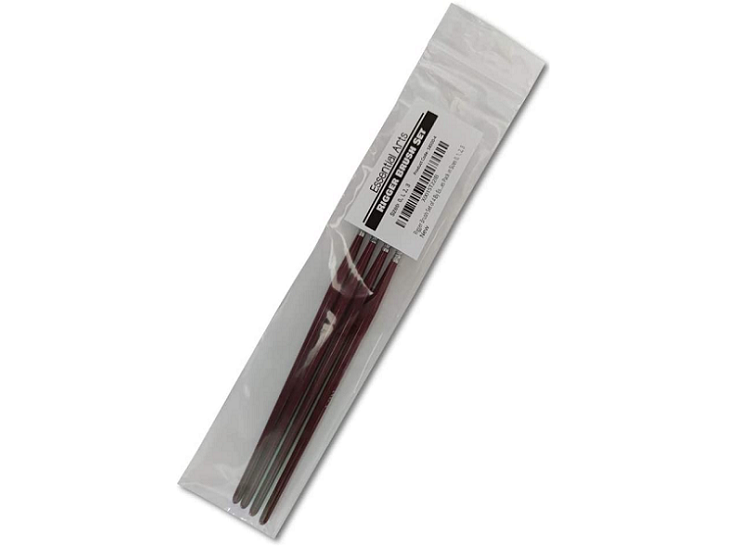
If you’re looking to use brushes and maintain control over your work, then try the Rigger Brush Set for smaller, more detailed pieces. This will set you back $7.30 for four brushes. Sizes include 0, 1, 2, 3. This product has been awarded an impressive 4.6 out of 5-star Amazon rating.
Pros
- These brushes enable you to create long, fine lines
- This is a great starter set with a decent assortment of brush sizes
- These brushes are reasonably priced
- Synthetic brushes (like these) don’t bend as easily and afford you greater control, ideal for stippling
Cons
- Synthetic paintbrushes don’t always pick up paint as well.
- Synthetic brushes may soften during warm weather.
Patelai Wooden Stencil Brushes
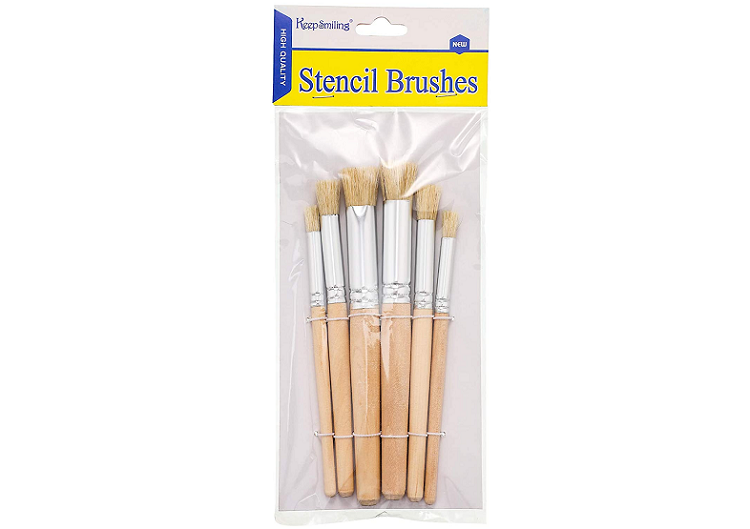
For larger stippling designs, stencil brushes work pretty well. We recommend trying the Patelai wooden stencil brushes, which will cost you $7.96 for a set of six brushes of variable sizes. This product has a respectable 4.3 out of 5-star Amazon rating.
Pros
- These brushes are made out of natural animal hair, and as such, hold color well.
- Smooth wooden handles for a comfortable grip
- Great price to value ratio
- A decent range of brush sizes is available in this set
Cons
- Animal hair brushes don’t offer as much control as they bend more easily, making them better suited to considerably larger stippling projects.
- Some customers report frequent bristle loss.
Zenacolor Acrylic Paints, Set of 12
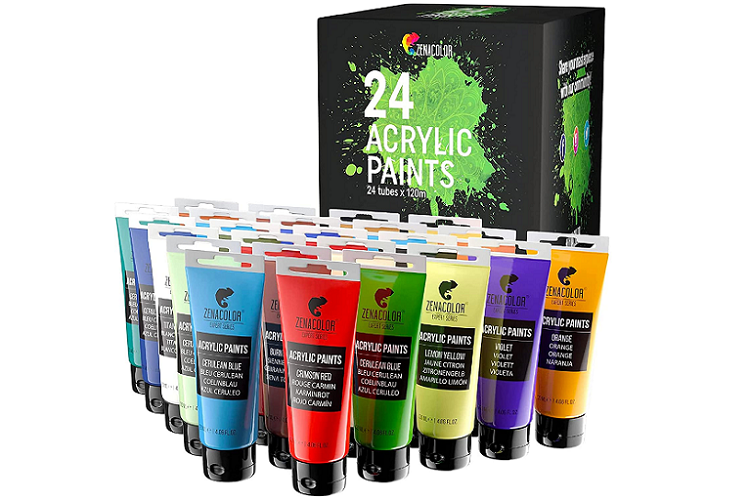
We recommend trying acrylic paints if you want to liven up your stippling art with a burst of color. These are often affordable to get started with and provide good, thick coverage. This Zenacolor acrylic paints set comes with 12 120ml tubes for $27.46 and offers a good range of colors.
Pros
- This paint is easy to mix to create a multitude of tones and colors
- This set provides a good quantity and quality of acrylic paint
- Access to high-intensity colors
- This paint is non-toxic, making it an excellent choice for stippling projects with children
Cons
- You need to be careful of smudging
- The white paint in particular needs a few layers to work, which might make it unsuitable for stippling
- Paints are sticky for some time after drying
FAQs
Last but not least, let’s answer some of the most commonly asked questions we hear about stippling art:
Question: How Can You Tell the Difference Between Pointillism and Stippling?
Answer: The main difference between pointillism and stippling is the use of color. Traditionally, stippling sticks to black and white (or a single monochromatic color). Whereas pointillism uses a mixture of two colors (or more) to create the illusion of blending.
Question: What are Some Other Uses of Stippling?
Answer: Stippling isn’t just popular for traditional mediums like paint and ink. The techniques can also be used in quilting and embroidery, where the thread creates a similar effect.
It’s also sometimes used in interior design to add texture to walls, either through the viscosity of the paint (the thickness) or dotting (as with traditional stippling – though this is less common). You may also see examples of stippling in heavily edited photography.
Beyond artistic or decorative purposes, you may also find stippling used for scientific illustrations such as plants where a high level of precision is needed to create an image.
Question: What Are Some Good Examples of Stippling?
Answer: The best way to learn about good stippling practices is to look at other artist’s examples:
Giulio Campagnola: This Italian artist and engraver is the father of stippling. His technique would later heavily influence printmaking and engraving techniques. Born in 1482 – c. 1515, he took inspiration from Venetian Renaissance oil paintings and translated them into stippled works. Campagnola intricately conveys light and darkness, and as such, is well worth a look if you’re looking for inspiration.
Xavier Casalta: This contemporary French artist creates realistic stippled artworks, which include a range of hyper-realistic depictions of architectural, botanical, and portrait pieces. He’s a good example to look at if you’re looking to create more precise works.
Marie Bogoyevitch: A biomedical scientist and a botanical artist. Her work demonstrates a more technical and scientific mode of illustration designed to depict the finer details of Australian plants and their anatomy. She’s an excellent example of someone who’s mastered the recreation of an image’s detail and accuracy.
Georges Seurat: This last artist is actually a pointillist. However, since his works are so prolific in the field of post-impressionism, he’s also worth taking a look at. His pieces look to convey movement and dynamism of light and are well worth a look if you’re interested in learning more about how to capture the spontaneity and rapidity of a landscape.
Are You Ready to Create Some Stippling Art?
We hope this article has provided you with all the info you need to get started on your stippling journey. But before you go, here are some last few takeaways to keep in mind:
- Practice – Remember, practice makes perfect. Don’t be disheartened if you don’t get it right the first time.
- Experiment – Try out different techniques and mediums until you find the one that suits you best.
- Learn – As with any art form, learning from the masters pays dividends – take advantage of stippling’s rich history to inform your practice.
With all that said, happy stippling! Let us know how you get on in the comments box below!
Check the guides below to find more inspiration:
How to Find the Best Resin for Jewelry