
- How to Find the Best Spray Paint for Metal - December 3, 2021
- Creative Wood Burning Ideas: To Bring Back Your Inspiration! - November 20, 2021
- Best Iron for Perler Beads Guide: To to Enjoy This Craft Even More! - November 20, 2021
Learning to knit can be a fun hobby to start at any time of your life. Whether you are a child, teen, young adult, or an older adult, it’s never too late to learn how to knit. Once you get the hang of holding those needles and hearing the click, click, clicking sound while watching your project develop into something amazing, you won’t want to stop.
There is nothing more satisfying than creating something from scratch and making it into something useful.
Knitted items create special memories for your kids, grandkids, loved ones, and friends. Knitted articles make wonderful gifts for those special people in your life. Maybe you have new neighbors and would like to take that blanket you just finished knitting as a housewarming gift to welcome them.
What a perfect gift to help you get acquainted. Maybe there is a special newborn baby in your life who could use a soft handmade blanket to nestle inside. Who doesn’t like a warm and cozy blanket?
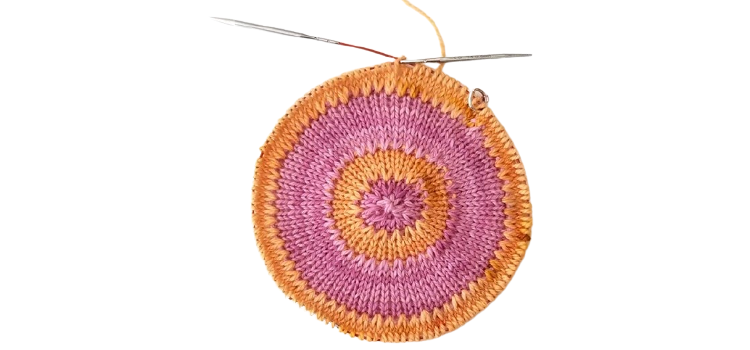
So, if you’re reading this article, you must be considering the art of knitting and how knitting works. While there are hundreds of things that can be created by knitting, in this article, we are going to focus on one thing – how to knit a circle.
Once you learn how to knit a circle, you can use this skill to create tablecloths, blankets, potholders, sweaters, socks, and so much more. Don’t worry, I will walk you through each step of the process so you won’t get overwhelmed. If you’re ready to knit some amazing things, let’s begin.
The Difference Between Flat Knitting and Circular Knitting
Before we can dive into the steps of knitting a circle, we need to look at two different knitting methods. I want you to comprehend the differences between these two knitting methods because I am going to show you how to knit a circle using both. Here is how these methods differ:
- Flat knitting produces rectangles and squares; whereas, circular knitting produces seamless shapes.
- Flat knitting requires that you use straight, single-pointed knitting needles or circular needles; whereas, circular knitting requires you to use double-pointed needles, (written in patterns as DPN’s) or circular needles that can have a flexible interchangeable cable or a flexible fixed cable between two needle points.
- Flat knitting is repeating the rows according to your pattern by continuing to remove your stitches from your left-handed needle to your right-handed needle; whereas, circular knitting produces tubes that are seamless, meaning that you won’t have to sew anything together, for the most part, when your project is complete.
- Flat knitting works well to make hot pads, scarves, and blankets – pieces that are either flat or need to be sewn together to make a completed project; whereas, circular knitting works best to make socks, gloves, sweaters, legwarmers, hats, and summer tops – clothing items.
Note: There are no right-handed or left-handed needles; all knitting needles can be used by either hand.
How to Knit a Circle With Circular Needles
Steps for knitting a circle with circular needles:
- Cast on the number of stitches according to your pattern. As with circular knitting, you are going to cast on your stitches just like you would if you were flat knitting. This video will teach you how to cast on if you are just learning how to knit.
- Check to make sure your stitches are not twisted. You want to make sure that the edges of the stitches are all in the middle of the circle.
- If you are a right-handed knitter, place a piece of yarn on the tip of the needle in your right hand; if you are a left-handed knitter, do the same on the left needle. You should use a piece of yarn that is of a different color than the yarn you are using in the project.
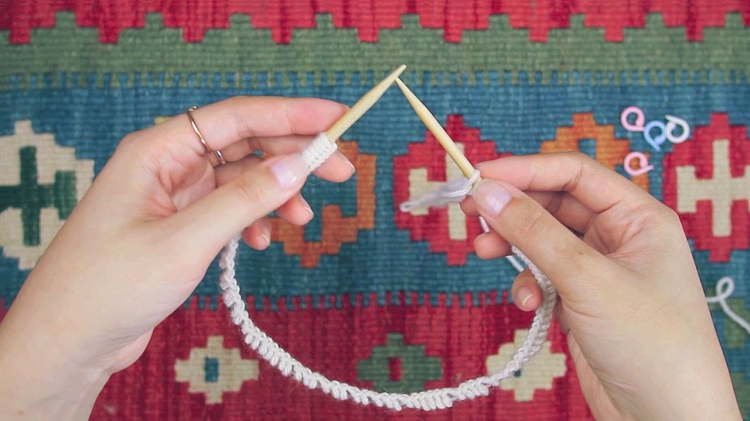
- Using your right-hand needle, place it in the first cast-on stitch on your left-hand needle, knit stitch the first cast-on stitch by placing it onto your right-hand needle. You have now joined the circle. For a visual aid to help you through this step, watch this video.
- Continue knitting in a circle or follow your selected pattern.
How to Knit a Circle with Double Pointed Needles (DPNs)
Double-pointed knitting needles are sold in sets of 4 or 5 needles. These are like straight needles, but they are pointed at both ends. Double pointed needles have also been referred to as sock needles, as they were used to knit socks.
These needles are used mostly for working with small circumferences, such as fingers on gloves. Eventually, you will catch on to the tricks and other types of knitting that are developed for knitting small circumferences.
- Cast on the specific number of stitches required by your pattern. The best cast-on method to use with DPNs is the Longtail Cast-On method.
- Divide those stitches onto 3 or 4 of the other needles from the set.
- Check to make sure your stitches are not twisted. You want to make sure that the edges of the stitches are all in the middle of the circle.
- Ensure that the cast-on tail and the working yarn are both coming from the needle you are holding in your right hand.
- Ensure that the needle you are holding in your left hand holds the stitches that begin each round.
- You are then ready to join-in-the-round by using the remaining needle to knit that first cast-on stitch, slipping it onto your right-hand needle. This is done the same way using circular needles. As you knit around the cast on stitches, you will continue to use the emptied needle as your right-hand needle for knitting.
Note: It does take some to get used to working with multiple needles at the same time, but eventually, you will catch on to the system. The reality is, you are still only working with two needles at a time.
Flat Knitting a Circle
Flat knitting a circle can be done with straight single pointed needles, but typically circular needles or double-pointed needles (DPNs) are the best and easiest to use.
Steps for Flat Knitting a Circle with Circular Needles
- Using your favorite method of casting on, add the number of stitches required for your pattern. Allow the stitches to slide down the cable of the right-hand needle while you work. Once you have cast on the number of stitches needed for your project, they should stretch around the length of your cable and reach your right-hand needle tip.
- Use a place marker of some sort, whether it is a different colored piece of yarn or a regular plastic stitch marker. This marker will show you where the beginning of the round is.
- To join your stitches, you need to turn your project over, causing the yarn ball that you’re using to thread onto the needles to be on your right hand.
- Make sure that your cast-on stitches have not twisted themselves around backward on the cable. You are now ready to knit into the first stitch that you previously cast on and then slip it over to your right-hand needle.
- Continue knitting in each cast-on stitch according to your pattern until you have completed your round. You will not need to check your yarn for twisting from here on out, as the stitches will always be on the correct side. The right side of your project should always be facing you.
Note: To help your stitches slide smoothly around your needles, use a circular needle that is slightly shorter in length than the width of your knitting. Hold your cable needles as you would your straight needles, allowing the cable to hang between your hands.
Fabric Patterns – Stockinette and Garter Stitches
Knitting and purling are the two ways to create texture or fabric patterns in your knitted project. These patterns are also useful for distinguishing which side of your project you are working on or to be able to distinguish the right and wrong sides of your project more easily.
Below are some practice projects to introduce you to these fabric patterns. Working through these practice patterns will help you see the differences between patterns. It will enlighten you as to how knitting and purling produce unique fabric patterns.
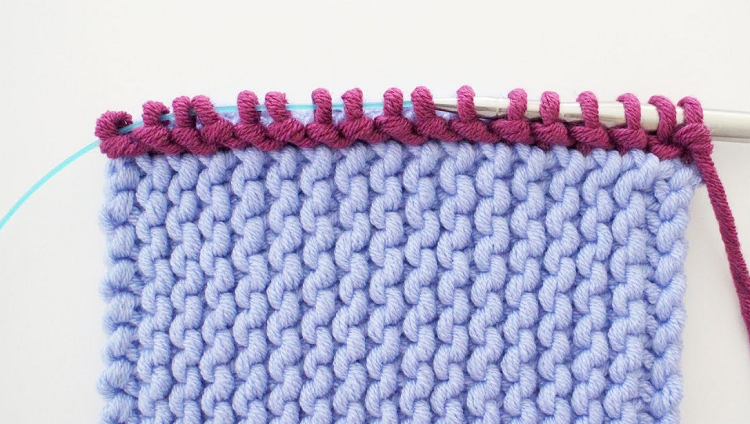
Garter Stitch
The garter stitch is the easiest and will be one of the first steps to learn in knitting. The garter stitch consists of knitting every stitch on your project, whether using circular needles or straight needles.
Circular Knitting
Remember you will always be knitting on the right side.
- Round 1: knit all stitches
- Round 2: purl all stitches
- Repeat rounds 1 & 2
Flat Knitting
Remember you will be rotating your work from the right side and the wrong side.
- Row 1: knit all stitches
- Row 2: knit all stitches
- Repeat rows 1 & 2
Stockinette Stitch
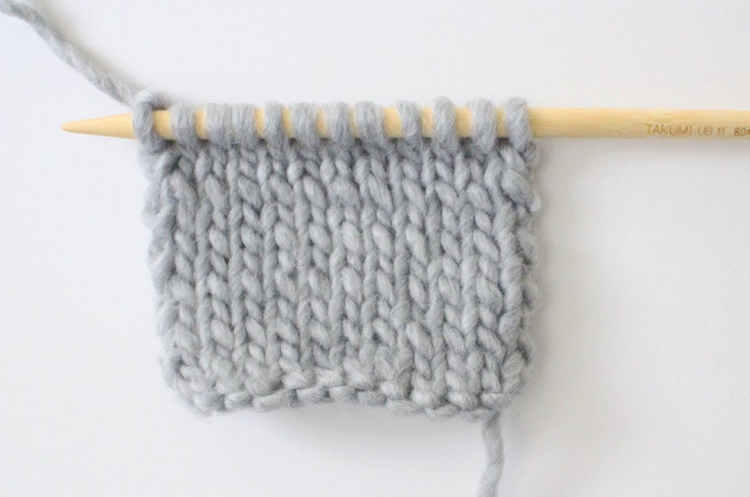
To do the stockinette stitch, you will need to know how to purl. The combination of knitting and purling creates the regular stitch in knitting, which is called the stockinette stitch. The knit side of the fabric is the right side of the garment, while the purl side of the fabric is the wrong side of the garment.
Circular Knitting
Remember, you will always be knitting on the right side.
- Round 1: knit all stitches
- Round 2: knit all stitches
- Repeat rounds 1 & 2
Flat Knitting
Remember you will be rotating your work from the right side and the wrong side.
- Row 1: knit all stitches
- Row 2: purl all stitches
- Repeat rows 1 & 2
FAQs
Question: Where Can Knit Patterns for Beginners be Found?
Answer: Here are two websites that offer free knitting patterns for those who are new to knitting:
Easy Beginner Patterns @ Circular Knitting
All Free Knitting
Question: What is the Right Side and the Wrong Side of a Knitted Project?
Answer: The right side and wrong side are knitting terms that a beginner knitter needs to pick up on. Once you have learned what each side looks like, the project that you are knitting will make sense to the beginner knitter.
When knitting items in the round, e.g., sweaters, gloves, and hats, the outside of the garment will be the right side, the inside of the garment will be the wrong side. In circular knitting, the knitter will be knitting on the right side of the project continually, which is the outside of the garment.
There is no turning the project around to the wrong side. There is, however, that chance after putting your project down for a while, and when picking it back up, you might lose track of which way you were knitting and accidentally start knitting the wrong side or wrong way, causing disarray to your project. This is why it is always a good idea to mark your project before setting it down.
When knitting flat items, such as a scarf, it’s a little more difficult to recognize the right side and the wrong side, but it’s not impossible once you have learned the difference. Some patterns will look the same on both sides, while other patterns will take on an attractive look that you will want to show off to your friends.
This is usually the right side, and of course, the wrong side will be the less attractive side. In flat knitting, the knitter will be knitting both sides of their project. This is because when you reach the end of the row, you will switch your project from the right-hand to the left by turning it around, and the opposite side will now be facing you.
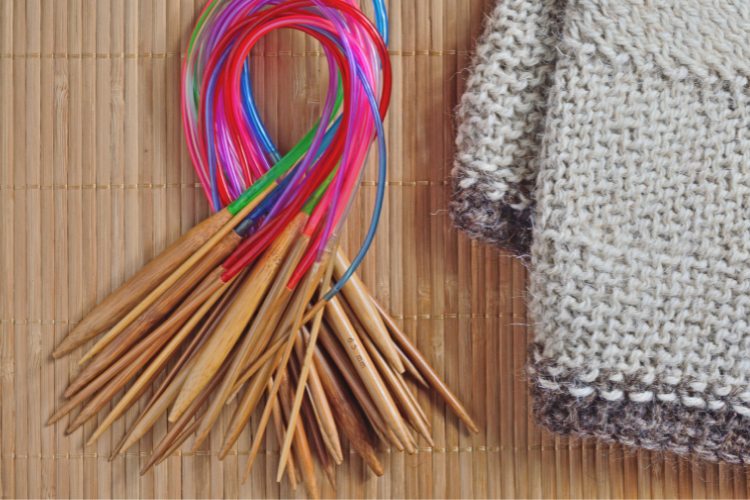
Question: What are the Best Knitting Needles for Beginners?
Answer: There are three main materials used for knitting needles. Each has its own advantages and disadvantages. It’s going to be your choice of what you like best. You can choose from metal knitting needles, synthetic knitting needles, or wood knitting needles. To help make your decision easier, let’s compare and contrast each type of material side by side.
Synthetic knitting needles
Either acrylic or plastic
Very lightweight
Colorful
Blunt endpoints
Great for thicker yarn
Pros
Inexpensive
Cons
The yarn seems to “stick” some needle brands
Easy to break
Blunt endpoints can keep from accuracy
Can be too flexible – this is something you don’t want needles to do
Wood knitting needles
Choices of bamboo, birch, or walnut wood
Durable materials
Stitches slide nicely
Great for lacey or bulky yarns
Pros
Feels nice
Can be very appealing
Cons
Dogs and cats love to chew on them
Tips are easily dulled over time
Yarn doesn’t glide smoothly
Polish wears down in time
Metal knitting needles
Steel or aluminum
Lightweight
Comes in brush metal for easier yarn gripping
Rainbow of colors to choose from – suggested to use as a contrast to your yarn color
Pros
Sharpest tips for accurate and precise knitting (varies by brand)
Very durable
The yarn glides easily off the tips of the needle
Tips won’t wear down
Cons
Can be an expensive purchase
Color can wear off and cause the yarn to catch while knitting – uncoated steel needles are recommended
Question: What is the Best Needle Size for Beginners?
Answer: It is just as important for knitters to consider needle size as it is to consider needle type and material. Beginners need to learn how important it is to understand needle size and what the difference is between needle ranges. Knitting needles range in size from US 1 to US 50. (2.25mm to 25mm).
One way to figure out which size to use is to check the pattern or the label of the yarn you have purchased. Each knitting pattern suggests what needle size needs to be used for that specific project.
Yarn brands also suggest what size of needle to use with each skein they produce. If the pattern and the yarn brand are in conflict over which size of a needle they recommend for a project, you should follow the pattern recommendations over the yarn suggestions. Therefore, choosing a pattern is the first step that should be taken before buying the yarn and needles.
Another thing to be aware of is whether you are a loose or tight knitter. This makes a big difference to your project’s outcome. You will learn how to adjust to the size of needles and yarn based on your knitting style.
Ultimately, I recommend that beginner knitters start with the middle range sizes, which would include US 7-10. This makes it easier and more workable as they learn to hold the yarn and the needles. However, bulky yarns and large needles make projects quick and easy to finish, so this is another great size option for beginners.
Question: Can You Use Circular Knitting Needles for Everything?
Answer: Yes, not only can circular needles be used for knitting in the round, but they can also be used for knitting flat pattern projects.
Question: What is the Purpose of Circular Knitting Needles?
Answer: Circular knitting needles help to distribute the weight of your flat knitting project as opposed to straight knitting needles that can’t handle a high number of stitches. Straight knitting needles have been known to bend or break under the weight of yarn.
Question: Do You Recommend Circular Knitting Needles for Beginners?
Answer: Yes, they are a great option for beginner knitters. Usually, beginners are experimenting with lightweight projects as they learn to knit, so using circular knitting needles can help with the coordination of getting used to knitting whether it is flat or circular knitting.
Question: Is it Hard to Circular Knit or Knit-in-the-round?
Answer: Knitting-in-the-round is a fun and easy way to learn to knit. Just because the needles are connected to each other doesn’t make it hard or complicated. In fact, the opposite is true. The long straight needles can sometimes be hard to handle and bulky in certain circumstances.
In Conclusion
Knitting a circle can be a fun way to experiment. Whether your latest project consists of hot pads, doilies, or hats, just enjoy the time spent creating something special and being able to say, “Yes, I made that with my own hands.” Let me encourage you to never give up on your projects. There’s always somebody out there in internet land or YouTube that can help you accomplish that difficult stitch.
If you’re interested in learning other types of yarn art, check out our tutorials on crochet, embroidery, and needlework. Whatever you are interested in learning, Craft & Stitch can help you get started and stay inspired.
Research Citations: