- How to Find the Best Spray Paint for Metal - December 3, 2021
- Creative Wood Burning Ideas: To Bring Back Your Inspiration! - November 20, 2021
- Best Iron for Perler Beads Guide: To to Enjoy This Craft Even More! - November 20, 2021
Whether you knit or crochet, scarves are an easy and classic project that both beginner and experienced crafters enjoy working on. The only problem that arises with this sort of project is how exactly to end a scarf.
It is not as though the sources on how to end a scarf are rare or difficult to find, it is much rather that there are dizzying amounts of tutorials and that teach how to end a scarf. Plus, there are ways to add extra little flourishes to the ends of scarves.
Because there are so many wonderful extras to add to the ends of scarves, we are going to have a lot of fun learning about each one and how to select one that will work for your specific project.
With all this excitement building, it’s time to venture into the world of scarves. Let’s learn how to start and finish the best scarf you’ve ever made.
Back to Basics
The first step to ending a scarf is to make either a final stitch or a final knit. Which one you do will depend on which type of yarn art you have selected for your project, ie, crochet or knit. Let’s get into the basic steps of how to end a scarf using each type of yarn art.
Crocheted Scarf
Choose any crochet scarf pattern that you want to create and when you get the final stitch, from the following:
- Complete the final stitch as directed in your pattern
- chain one
- Pull up the chain loop so that it is approximately six inches long
- Cut the chain loop in the middle
- Pull the yarn tail tight so that a knot forms at the end of the pattern’s final stitch
- Weave in the yarn tail
For those who are visual learners, watch this short video to make sure you fully understand how this process works.
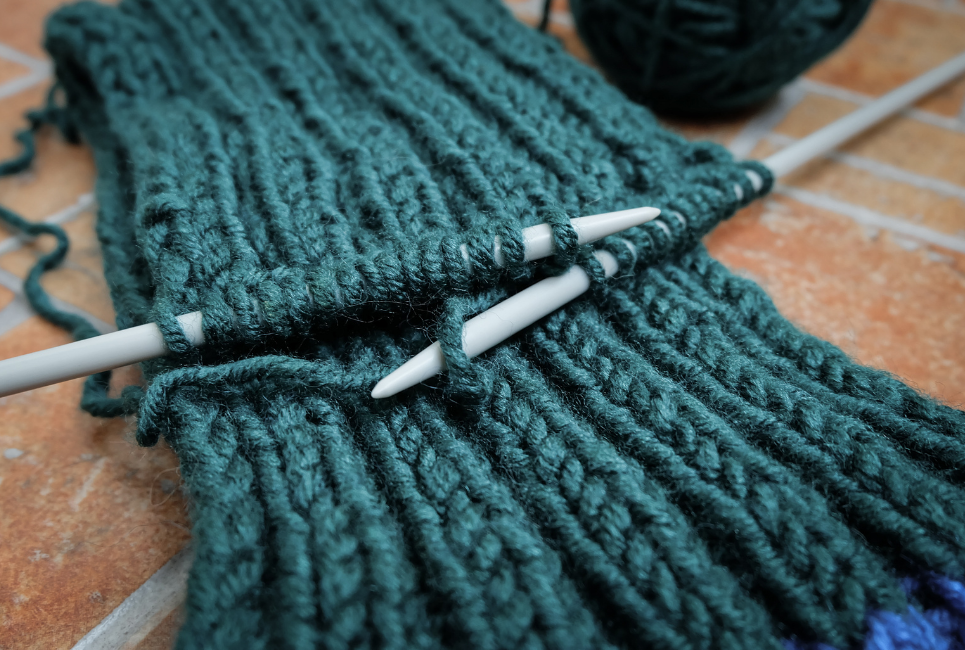
knitted scarf
Choose any knit scarf pattern that you want to create and when you complete the final row, from the following:
- Knit two stitches onto your right knitting needle
- Grab the first of those two stitches with the left knitting needle and pull it over the second stitch (you should have only one stitch on your right knitting needles while the left knitting needle is still attached to the project)
- Knit one stitch onto your right knitting needle
- Grab the first of those two stitches with the left knitting needle and pull it over the second stitch (you should have only one stitch on your right knitting needles while the left knitting needle is still attached to the project)
- Repeat steps 3 & 4 until all the stitches have been removed from your left knitting needle and you have one stitch remaining on your right knitting needle
- Cut the yarn attached to the final stitch so that it is approximately ten inches long
- Wrap the yarn tail around the tip of the knitting needle but above the final stitch
- Pull the yarn tail loop through the final stitch
- Pull and tighten the yarn tail loop so that it forms a knot at the end of the final stitch
- Weave in the yarn tail
For those who are visual learners, watch this short video to make sure you fully understand how this process works.
Ending with Embellishment
You could very simply end your scarf by weaving in the yarn tail and letting the beauty of the scarf pattern speak for itself. Or, you could add some extra flourishes, add touches of embellishment if you will.
Let’s look at some really fun and attractive ways to spice up the end of a scarf. By the way, these extras are not partial to crochet or knit; they love both yarn arts equally.
Tassels
These pieces of extra fringe are going to enhance the beauty of your scarf, especially if you play around with color. This embellishment allows you to be creative because it doesn’t have you into one color or length. When you consider how to use tassels to make your scarf uniquely yours, try one of the following options:
- Use colors for the tassel that are not in the scarf but complement the colors of the scarf
- Use a different color for each tassel
- Use two colors and combine them into each tassel
- Use two colors and make every other tassel a different color (example: the first tassel is red, second tassel is blue, third tassel is red, fourth tassel is blue and so on)
- Place tassels only on the corner stitches
If embellishing your scarf with tassels is interesting to you, get out a crochet hook (even if the scarf is knitted) and get ready to work some yarn magic. Here are the steps for creating amazing tassels:
- Cut the yarn to the length you would like the tassels to be (keep in mind that the tassels will be approximately half the length of the yarn strands that you cut
- Fold the yarn strands in half so that the touch ends and there is a loop in the middle
- Place the middle of the yarn strand loop next to a stitch on the end of your scarf
- Put the crochet hook into the stitch and grab the yarn strand loop
- Pull the yarn strand loop through the stitch until there is a decent amount on one side of the stitch but the ends of the yarn are still on the other side of the stitch
- Place the ends of the yarn into the loop on the other side of the stitch
- Pull the ends of the yarn through the loop and tighten the loop so that it forms a knot
- Repeat these steps until all the end stitches have a tassel tied to them
- Trim the ends of the tassels as needed
For those who are visual learners, watch this short video to make sure you fully understand how this process works.
https://www.google.com/search?q=how+to+add+tassels+to+knitted+scarf&rlz=1C1NHXL_enUS957US957&oq=how+to+add+tassels+to+kni&aqs=chrome.2.69i57j0i22i30j0i20id02i20i2630j12i5 =UTF-8#kpvalbx=_D38dYerjCpyHxc8PnLiroAg40
Beads
Another great way to add a little flare to a scarf is to attach beads to the tassels or fringe hanging on the ends of the scarf. This is a fun project and it is very simple to do. Here are the steps:
- Select beads that look nice alongside the scarf
- Twist the end of the fringe so that it is tight and it is easier to slide through the hole in the bead
- Slide the fringe through the bead
- Secure the bead onto the fringe by tying a knot
For those who are visual learners, watch this short video to make sure you fully understand how this process works.
pom poms
If you like scarves that are fun and playful, consider creating and attaching some pompoms to the end of yours. This is another very fun and simple project. Here are the steps:
- Cut a very long strand of yarn and place it between two prongs of a fork
- Wrap yarn around the fork until you reach your preferred thickness
- Cut off the yarn tail
- Tie the middle of the yarn loop with the strand of yarn that is between the two fork prongs (make sure to knot it so that stays secure and keep one end of the strand this strand long throughout the rest of this process)
- Use a crochet hook to chain five in the long strand of yarn that is tied around the pom-pom and pull up a loop on the end of the five chains (this step is optional; if you prefer your pom pom to be attached without a chain, skip this step)
- Cut the two yarn loops that you just created by tying yarn around the first yarn loop (yarn ends should be sticking out and there should not be any yarn loops left)
- Trim the ends of the yarn and shape it into a round pom pom
- Use the long yarn strand that is tied around the pom pom to attach the pom-pom to the end of the scarf
- Weave in the ends
For those who are visual learners, watch this short video to make sure you fully understand how this process works.
Embroidery
Even if you don’t know a lot about embroidery, there is no need to fret because there are plenty of simple embroidery patterns and ideas that anyone can do. This is a beautiful craft that will look amazing on crochet or knit scarves, so start planning your projects now.
To give you a little inspiration, consider using one of these awesome ideas:
FAQs
Question: How Long and Wide Should a Scarf Be?
Answer: The width of a scarf is all up to you but scarves typically measure anywhere between 6 and 14 inches wide for adults. Scarves for children should be between 5 and 7 inches wide so that they won’t bunch up around their small necks.
The length of a scarf should be equal to the measurement between the tip of a person’s right hand to the tip of their left hand. This averages out to 60 to 70 inches for both men and women. Of course, this will vary depending on a person’s measurements.
Question: What are Some Easy Crochet & Knit Scarf Patterns?
Answer: Scarves are actually one of the easiest yarn art crafts to learn and to do. Projects featuring scarves can be done while chatting with friends or listening to music or podcasts because they typically call for the same stitches to be repeated again and again. This is why so many beginners choose to crochet or knit scarves as one of their first projects.
With this in mind, we can be sure that there are plenty of resources to help us find an easy pattern for creating amazing scarves. Books, blogs, and YouTube videos are readily available online. No matter which format you choose, you can be guaranteed that you will find some amazing patterns, some of which, will be free.
If neither of these formats interests you, try looking for a class at your local craft store, community center, or junior college. Oftentimes, there are fun community gatherings that can broaden your crafting experience.
Here are a few scarf patterns that you may enjoy getting into right away:
Crochet Vanilla Latte Super Scarf
Crochet Color Pop Super Scarf
Knit Maipo Scarf
Knit Toffee Scarf
Question: What is the Best Type of Yarn to Make a Scarf?
Answer: This will depend on what yarn art you plan to use. You can craft a scarf by using either crochet or knit and each of these yarn arts will require slightly different tools. Here’s a basic list for each:
Crochet Scarf Tool List:
Crochet Hook
Measuring Tape
Scissors
Stitch Marker
Yarn
Yarn Needle
Knit Scarf Tool List:
(Crochet Hook may be needed for some finishing touches such as adding fringe)
Knitting Needles
Measuring Tape
Scissors
Stitch Marker
Yarn
Yarn Needle
In Conclusion
Scarf making is a fun project that allows crafters to show their style with color, pattern, and embellishment. These make great gifts, items to sell, or items to keep for yourself. Whether you prefer to craft a scarf by knitting or by crocheting, you can be guaranteed a beautiful and useful item.
Research Citations