- How to Find the Best Spray Paint for Metal - December 3, 2021
- Creative Wood Burning Ideas: To Bring Back Your Inspiration! - November 20, 2021
- Best Iron for Perler Beads Guide: To to Enjoy This Craft Even More! - November 20, 2021
It’s a necessary piece of kitchen equipment, it’s small and it’s simple, but without a potholder, you would be enduring a lot of burnt hands and discolored tabletops. Sure, you could fill your kitchen drawers with a collection of potholders from fancy and chic stores or from stores that sell bulk products at bargain prices, but why limit yourself to the designs of others?
Crocheting your own collection of potholders is a great way to showcase your creative talents and favored colors and designs. Not only are crocheted potholders a source of expression and creativity, but they are also fun and easy to make. Let’s learn how to crotchet a pot holder, and find you the perfect design.
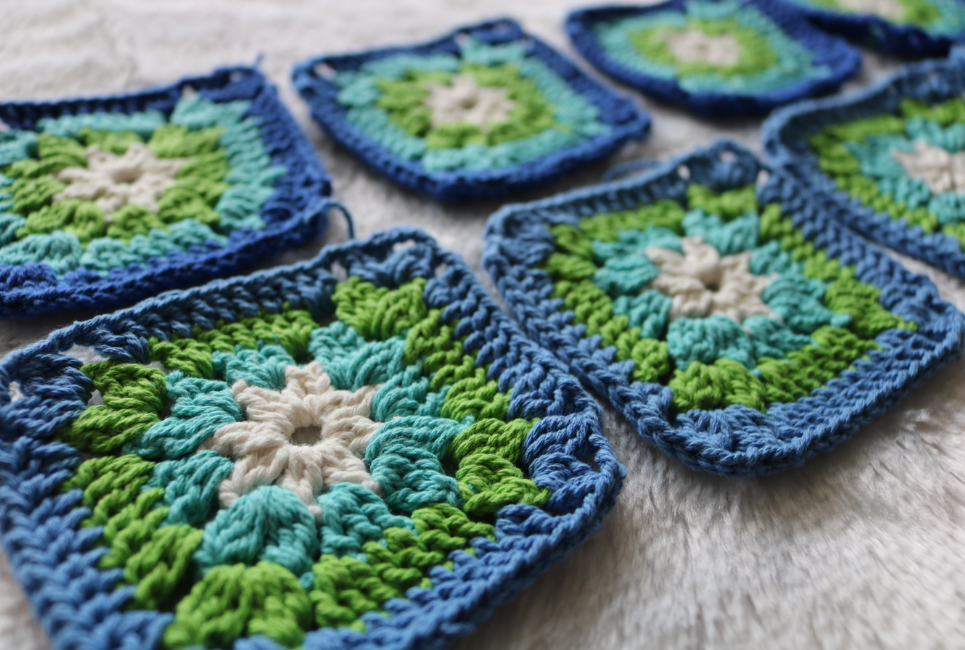
It’s Time to Dream of a Design
The first thing you will need to do is decide on your dream design. What this basically means is that you need to select a potholder pattern. There are dozens of ways you can crochet a potholder and there’s no reason to limit yourself to one style or pattern for all the potholders in your collection. Remember, this is a chance for you to be creative and express your style, so choose a few patterns that you really like.
Here are a few potholder pattern options to consider:
Basic Square

This is the simplest and quickest way to create a potholder. The only problem with this type of potholder is that they are usually not very thick, so they will not be useful in handling extremely hot dishes. If you’re interested in building up your collection in a matter of hours, follow these steps:
Supplies:
- Yarn
- Scissors
- Ruler
- Crochet hook
- Yarn needle
Set-up:
- Chain a six-inch-long chain
First Row:
- Single crochet in the second chain from your hook
- Place a stitch marker in the first single crochet of the first row
- Single crochet in every chain until the end of the row
- After your final single crochet of the first row, chain one
- Turn your work
Second Row to the Last Row:
- Single crochet in the final single crochet of the previous row
- Place a stitch marker in the first single crochet of the row
- Single crochet in every stitch until you reach the final stitch of the row that has a stitch marker in it
- Remove the stitch marker and place a single crochet stitch in the final stitch of the row
- After your final single crochet of the row, chain one
- Turn your work
- Repeat steps 1 through 6 until you reach the width you want
Finishing Up:
When you have reached the size you prefer, make one chain on the final single crochet stitch of the pattern. Pull the chain loop so that it is about 4 inches long. Cut the chain loop in half. Weave in the 4-inch long tail with a yarn needle.
Note: This pattern can easily be done with any crochet stitch, not just a single crochet stitch, but the single crochet stitch is tighter, which means there is more fabric between your hand or table and a hot dish.
Basic Thermal Stitch Square

This type of stitch will take more time to work through, but the end result is a potholder that is thick and sturdy. You won’t be worried about burning your hand or your table with one of these assisting with food. If you’re interested in building up a collection of tough and trustworthy potholders, follow these steps:
Supplies:
- Yarn
- Scissors
- Ruler
- Crochet hook
- Yarn needle
Set-up:
- Chain any number (7 or 8 inches long is a good length)
First Row:
- Half double crochet in the back bump of the second chain from your hook
- Place a stitch marker in the first crochet stitch of the first row
- Half double crochet in the back bump of every chain until the end of the row
- After the final half double crochet of the first row, chain one
- Turn your work
Second Row to the Last Row:
- Half double crochet in the back loop and the parallel loop of the final half double crochet of the previous row

- Place a stitch marker in the first half double crochet of the row
- Half double crochet in the back loop and parallel loop every stitch until you reach the final stitch of the row that has a stitch marker in it
- Remove the stitch marker and place a half double crochet stitch in the final stitch of the row
- After your final half double crochet of the row, chain one
- Turn your work
- Repeat steps 1 through 6 until you reach the width you want
Finishing Up:
When you have reached the size you prefer, make one chain on the final half double crochet stitch of the pattern. Pull the chain loop so that it is about 4 inches long. Cut the chain loop in half. Weave in the 4-inch long tail with a yarn needle.
Basic Double Crochet Circle

There’s no reason to limit the shape of your potholders to squares. You can make potholders into rectangles, triangles, or circles. They are all very easy to do. If you’re interested in building up a collection of uniquely shaped potholders, follow these steps:
Supplies:
- Yarn
- Scissors
- Ruler
- Crochet hook
- Yarn needle
Set-up:
- Either create a beginning loop or a magic circle with your yarn
- Chain five
- Slip stitch into the first chain to create a circle

First Row:
- Chain three (these three chains will count as one double crochet stitch)
- Place a stitch marker in the third chain
- Double crochet in the center of the chain circle eleven times

- Pull the tail of yarn in the center of the chain circle to cinch the circle tight
- Slip stitch into the chain with the stitch marker
Second Row:
- Chain three (these three chains will count as one double crochet stitch)
- Place a stitch marker in the third chain
- Turn your work
- Double crochet one stitch in the loop with the ‘chain three stitch’
- Double crochet two stitches in the loop to the left
- Repeat step 5 until you reach the stitch marker (you should have 24 stitches in this round)
- Slip stitch into the chain with the stitch marker
Note: row two doubles the number of stitches from row one
Third Row:
- Chain three (these three chains will count as one double crochet stitch)
- Place a stitch marker in the third chain
- Turn your work
- Double crochet two stitches into the stitch to the left of the ‘chain three stitch’
- Double crochet one stitch in the next loop
- Double crochet two stitches in the next loop
- Repeat steps 5 and 6 until you reach the stitch marker (you should have 36 stitches in this round)
- Slip stitch into the chain with the stitch marker
Note: row three adds an additional stitch on every other loop
Fourth Row:
- Chain three (these three chains will count as one double crochet stitch)
- Place a stitch marker in the third chain
- Turn your work
- Double crochet one stitch into the stitch to the left of the ‘chain three stitch’
- Double crochet one stitch in the next loop
- Double crochet two stitches in the next loop
- Double crochet one stitch in each of the next two loops
- Double crochet two stitches in the next loop
- Repeat steps 7 and 8 until you reach the stitch marker (you should have 36 stitches in this round)
- Slip stitch into the chain with the stitch marker
Note: row four adds an additional stitch every two loops
Additional Rows:
As you may have noticed, each row in this circular potholder adds a stitch at select intervals in order to increase its size. You can continue adding as many more rows as you want by adding a stitch at regular intervals. Here are the basics for doing this:
- Row 5: This should have a total of 48 stitches created by adding an additional stitch every three loops.
- Row 6: This should have a total of 60 stitches created by adding an additional stitch every four loops.
- Row 7: This should have a total of 72 stitches created by adding an additional stitch every five loops.
- Row 8: This should have a total of 84 stitches created by adding an additional stitch every six loops.
Finishing Up:
When you have reached the size you prefer, make one chain on the final double crochet stitch of the pattern. Pull the chain loop so that it is about 4 inches long. Cut the chain loop in half. Weave in the 4-inch long tail with a yarn needle.
Note: You can add on as many rows as you want as long as you add additional stitches. You can also add fringe to the outside edges of this potholder if you want a little extra.
Video Tutorials
If these basic patterns are too basic for you, try a few more complicated or advanced projects. The best way to work through this type of crochet project is to follow a video tutorial.
Video tutorials will allow you to view how each stitch should be made and to pause and rewind if you don’t fully understand the stitch the first time. Plus, many video tutorials have comments sections where you may be able to find answers to questions that arise during the completion of your chosen project. Here are a few videos to get you started:
- Magic Hotpad
- Swirl Hotpad
- Triple Thick Pot Holder
- Cluck the Chicken Pot Holder
- Cherry Pie Pot Holder
- Tapestry Style Pot Holder
It’s Time to Select Some Yarn

There are no hard and fast rules about what yarn you use when you make a potholder but do keep in mind that certain fabrics work better under pressure and heat than others. The best yarn for this type of project is definitely cotton.
Cotton fabric yarn has many great qualities that make it ideal for use in crocheting a potholder. Here are a few of its pros and cons for this type of project:
Pros:
- Cotton yarn does not stretch
- Cotton yarn does not pill
- Cotton yarn is very durable
- Cotton yarn provides good definition to stitches
- Cotton yarn comes in many different colors and weights
Cons:
- Cotton yarn can droop after washing it
- Cotton yarn is tight and since it is not slick it can be difficult to crochet with
When it comes time to select a color for your potholder, that will be entirely up to you. You can select any color that is available to you or opt for the colors recommended in your chosen potholder pattern. Fortunately, cotton yarn is available in a wide variety of colors so you should not feel limited in your selection.
It’s Time to Block Your Project
Many times crochet projects will require that you block them after they are completed. This process allows you to shape the project so that it will lay flat, remove any bumps, and make sure it looks the way it should. Here’s how:
Supplies:
- Tub or container that will hold water
- Warm water
- Clean towel
- Yarn blocking board
- Blocking combs and needles
The Steps for Blocking a Crochet Project Are:
- Fill the container with warm water
- Set your crocheted potholder in the water
- Give your potholder time to soak up as much water as possible
- Remove your potholder from the water and gently squeeze out excess water (do not twist or stretch the stitches)
- Lay your potholder on a clean towel
- Roll the towel like a sushi roll with the potholder in the middle of the roll
- Unroll the towel
- Move your potholder to a blocking board
- Flatten out your potholder and form it into the shape you want it in
- Pin the edges of your potholder so it will remain in its proper shape
- Allow the potholder to dry before removing it
FAQs
Question: Where Should I Purchase Cotton Yarn?
Answer: Cotton yarn is readily available at many craft supply stores such as Joann, Michael’s, and Hobby Lobby. These stores make it easy to purchase yarn online and in a store. But, there are shops that sell exclusively online by creating a community of crafters. One such store is Darn Good Yarn.
Question: Are there Sites Where I Can Go to Get Help With a Crochet Project?
Answer: Yes, there are skilled crochet artists that have created websites to help with any issue you may face while working on a project. Here are two popular sites:
• Craft Yarn Council
• All Free Crochet
Question: Can Potholders be Designed to Hang on a Kitchen Wall?
Answer: Absolutely, yes. You can add a fun strap to the corner of any potholder very easily. Here is an easy strap pattern.
Question: Should I Wash the Yarn Before Crocheting With it?
Answer: This is entirely up to you. If your yarn needs to be cleaned or softened, it is a good idea to wash and soften it before working it into a project. However, you can also plan to do this when you block your project.
It’s Time to Wrap Up Your Project
Crocheted potholders are not just a nice thing to keep in your kitchen, they are also a lot of fun to make and to give away. Consider making a few for yourself first, but then, don’t stop there. Create a stylish set to give to friends as wedding gifts or as housewarming gifts. They’re going to love these unique and personalized gifts as much as you will enjoy making them.
Research Citations
For more interesting guides check the links below: