- How to Find the Best Spray Paint for Metal - December 3, 2021
- Creative Wood Burning Ideas: To Bring Back Your Inspiration! - November 20, 2021
- Best Iron for Perler Beads Guide: To to Enjoy This Craft Even More! - November 20, 2021
In the past few months, fabric art has gotten an uptick in participants. There’s really no mystery behind the sudden interest in this art form. People are looking for things to do, things that will both challenge them and provide them with a skill they can use. Fabric art is the answer to both objectives.
Working with fabric, and with yarn in particular, not only provides a creative outlet, but it can also be a way to build a business.
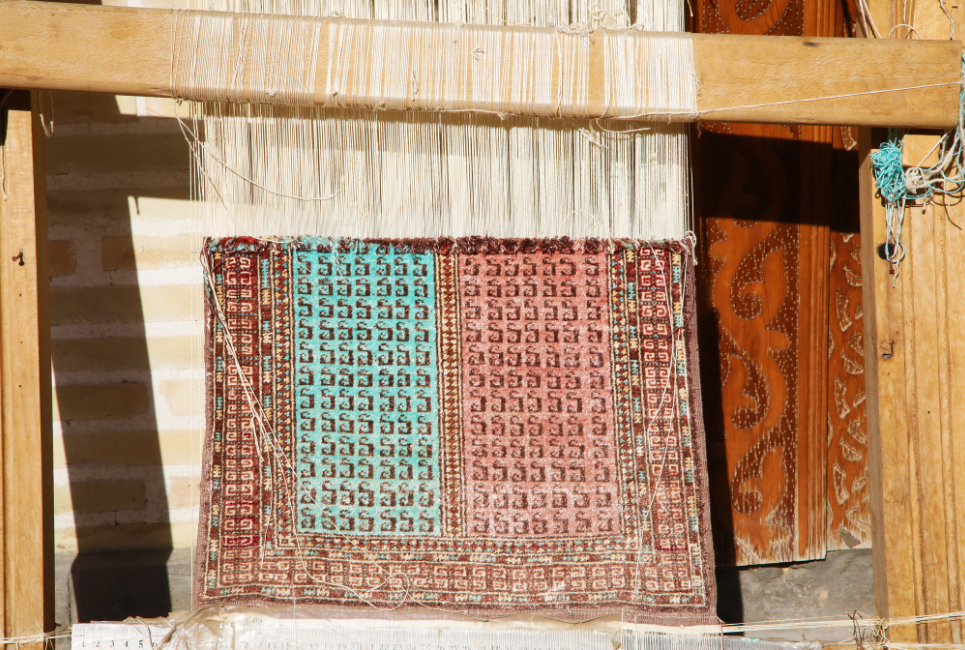
Fabric art does include crochet, knitting, embroidery, and sewing, but it also includes weaving. All of these forms of fabric art have become more popular than ever due to many months of self-quarantining and social distancing. While we are looking forward to more time outside this year, fabric art is still a great pastime for evenings indoors or when the weather is less than congenial.
So, why not start learning one of these great artforms today?
A New Adventure
Most new crafters delve into the overtly accessible crochet and knitting patterns, but perhaps you are ready to deal with something a little more challenging. Let’s talk about weaving.
Honestly, if you know anything about the other types of fabric art, weaving will not be too difficult to jump into. In fact, it might be a source of inspiration for all your creative artwork.
If you are a true beginner when it comes to fabric art, weaving may present a bit of a challenge to learn, but if you persist it will be so rewarding. Just focus on all the beautiful projects you will be able to complete if you persevere through the learning process.
Surprised by Design
What is truly surprising about the art form of weaving is that you can build your own pin loom. Sure, you can purchase looms from craft stores and online shops, but why not try your hand at building your own? It will only add to the sense of self-confidence and personal pride in your work. Plus, it is actually a fun project in and of itself.
There are three different ways you can build a pin loom for weaving. Each type requires a few supplies that are easy to find at craft stores, or you may have them laying around your house. Let’s look at each pin loom separately so you can decide which type you prefer to make.
Frame Looms
This is a very simple and straightforward way to build a pin loom. Here is what you will need:
- Picture frame (any shape and size will work)
Tip: You can purchase a cheap piece of art and remove the canvas or picture from the frame; there’s no need to buy anything expensive
- Drill
- Drill bit stop collars
- Nails
- Ruler or tape measurer
- Writing utensil
- Hammer
Once you have gathered all the necessary tools and supplies, following these simple steps to create your personal pin loom.
- Measure and place marks with your writing utensil of choice on each of the four corners.
It is essential that the corners are evenly measured. If your frame is a square each mark should be the same number of inches or centimeters apart. If your frame is a rectangle the long sides should be measured the same and the short sides should be measured the same.
Tip: The easiest way to measure the corners is to measure from the outside edges of the frame. Measure each corner the same number of inches or centimeters inward from both outside edges and you will get a cross mark. These marks will line up nicely with the other corner marks.
- Use your writing utensil and a straight edge to draw a line between the marks at the four corners.

- Use a ruler to measure and mark evenly spaced dots or lines along the straight lines between the four corners.
- Drill holes in each of the four corner marks and in each of the marks along the straight lines between the four corners.
- Place nails into the drilled holes and tap them in with a hammer.

Tip: There is no need to tap them all the way through the frame, they just need to be firmly in place.
- Start weaving
Board Looms
This is another type of loom that will be easy to make; in fact, it is even easier than building a frame loom. Here is what you will need:
- Board (any size and shape you prefer)
- Drill
- Drill bit stop collars
- Nails
- Hammer
- Ruler or tape measurer
- Writing utensil
With all your supplies gathered, it’s time to put together your board pin loom.
- Use a ruler to measure out and mark straight and even spaces on the top and the bottom of the board. It is recommended that you space these marks 5mm apart but you can decide how much space you want.
- Drill holes in the marks along the top and the bottom of the board.
- Hammer nails into the drilled holes. Again, there is no need to hammer the nails all the way through the board.
- Your board pin loom is ready for use.

Miscellaneous Looms
This type of pin loom is easy to make with items you have laying around the house. Here are some of the essential things you will need:
- Piece of foam and/or cardboard
- Box cutter
- Sewing pins
- Nails
- Ruler or measuring tape
- Writing utensil
After gathering all your supplies, find a place to sit down and create your pin loom.
- Use your measuring tools and writing utensil to draw the shape and size of your pin loom on the foam or cardboard.

Tip: It is best to use both foam and cardboard glued together because the cardboard provides strength and the foam provides depth for the pins.
- Trace a center that will be cut out. A loom with a hole in the middle makes it easier to weave.

- Mark the corners of the loom evenly.

- Use a ruler to measure and mark even spaces between each corner mark.

- Use your box cutter to cut out the pin loom that you traced onto foam or cardboard.

- Glue the cardboard and the foam together. Allow them to dry.
- Use the sewing pins to make holes where you have marked the loom.
- Place nails in the holes made by the sewing pins.

- The pin loom is ready for use.
Tip: Creating a loom with foam and cardboard allows you to make a loom in any shape and size you want. With these materials, you are not limited to the square and rectangular shapes of wooden frames and boards. These can be circular, triangular, hexagonal, or even heart shaped. When you design your own loom, almost any shape is possible.
FAQs
Question: How Can You Learn to Weave on a Pin Loom?
Answer: Learning a new craft or hobby has never been as easy as it is today. Modern conveniences have made it easy to access all sorts of tutorials that fit into a busy person’s schedule. Plus, it has made it easy for every type of learner to get the help they need in the learning medium they need it in, whether that is written or verbal or through video examples.
If you want to learn how to weave on a pin loom, try one of these convenient methods.
• YouTube Video Tutorial
• Written Tutorial
• Online Courses
• Printed Books
• Workshops and Seminars
Question: What Can You Make with a Pin Loom?
Answer: There is more to a pin loom than pot holders. Sure, these are a fun and easy project to begin with, but if you’re going to invest time and resources into learning how to weave, you might as well set your sights a little higher. If you’re interested in moving beyond the basics, try some of these amazing projects on your pin loom.
• Woven Elephant
• Purses
• Scarves
• Blankets
• Jacket
• Pumpkins
• Wall Tapestry
Question: What Supplies Do You Need to Weave on a Pin Loom?
Answer: The main two things that are needed when it comes to weaving is patience and creativity. The other supplies are easy to obtain. Here are the basic things needed to have a successful time weaving on a pin loom.
• A Pin Loom: This is an obvious supply. You can’t do much weaving without a weaving loom. The purpose of this article is to make it easy to create your own pin loom, but if you don’t have the time or the supplies, you can always purchase one.
• Warp and Weft: These are the fabric strands that will be woven up and down and from side to side to create the woven project. Warp fabric strands (the vertical threads) can be any color you choose, but should be sturdy and not stretchy. Weft fabric strands (the horizontal threads) can be made out of scraps, ribbon, yarn, or anything you can think of. These strands are perfect for allowing your creativity loose. Choose color and texture that will stand out and make a beautiful creation.
• Shuttles or Tapestry Needle: These are the tools that help move the weft fabric strands horizontally through the warp fabric strands.
Combs: These tools are used each time the weft fabric is thoroughly woven from one side to the other. The teeth of the comb push down the weft fabric threads and compact them together so the woven texture is tight and orderly.
• Shed Stick: Fancy versions of these can be bought online or for a simpler version try using a dowel rod. This tool is multi-purposed. It can be used to build tension at the bottom of the weaving, it can be used as a tool for compacting the weft fabric, or it can be used to weave the weft threads back and forth. At any rate, it’s nice to have this tool on hand to help with all the intricacies of weaving.
Weaving It All Together
So, now you know all about the art of pin loom weaving from the bare-bones basics of how to create the loom itself to what supplies you need and where to learn how to weave. This is the perfect time to make your own loom and perfect your weaving skills.
Pin loom weaving is a fun and stimulating craft to learn. It is definitely one of those hobbies that is enjoyable while relaxing alone or while socializing with your community.
Just as the threads are woven together to create a harmonious and admirable piece of art, the act of fabricating the artwork has the ability to weave together beauty and harmony in a community of crafters as well. Enjoy your time at the loom and enjoy what it brings to you in your community.
For more interesting guides, check the links below: